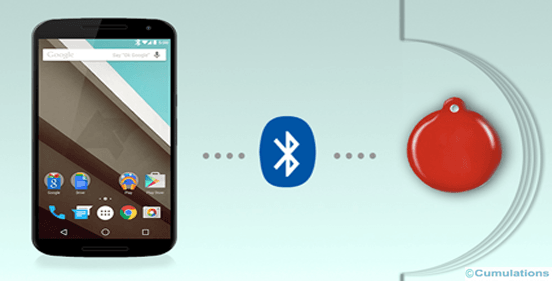
Let’s look into Over The Air Download (OAD). In today’s Internet of things, (IoT) domain BLE (Bluetooth Low Energy or Bluetooth smart) is playing a major role in communication purposes, especially for wearable devices. In this tutorial, we will be explaining how to do a firmware upgrade over BLE or over-the-air download (OAD) on TI’s Sensor Tag which has CC2541 SoC. Sensor Tag is a BLE-enabled multi-sensor device that has an ambient temperature, infrared temperature, relative humidity, barometer, magnetometer, accelerometer, and gyroscope. It’s a general practice and required feature in all mobile apps for Wearables and the Internet of things to flash new firmware over BLE when there is an update.
Problem Statement: Android BLE stack is a bit unstable compared to iOS, mainly when the app is running continuously for hours and keeps interacting with the external hardware. This causes a frequent disconnection between the phone and the hardware. After days of research, we found a solution wherein changing the connection parameters of the hardware reduces the number of disconnections in a big way. But how do we pass on this solution to our existing customers for whom hardware devices are already distributed and are up and running?
Solution:
We can solve this problem by doing a firmware upgrade over-the-air download(OAD) from the app to the hardware!!! We asked users to download the latest app from the google play store so that they can have their latest firmware on their BLE device.
Texas Instruments has defined procedural steps to flash firmware onto the device as described below. Before writing the steps I am assuming the reader will have basic knowledge about interacting with BLE devices (using services and characteristics which are identified by their UUIDs).
Steps in Over The Air Download
Step 1: To begin with set the profile of the device to OAD mode by writing a one-byte value(in our case value is 4) to the profile characteristic. Below is the code to set the profile to OAD mode :
BluetoothGattService otaService = mBluetoothGatt.getService(OTA_SERVICE_UUID);
BluetoothGattCharacteristic otaCharacteristic = otaService.getCharacteristic(OTA_CHARACTERISTIC_UUID);
if (otaCharacteristic != null) {
byte[] value = new byte[1];
value[0] = 4;
otaCharacteristic.setValue(value);
boolean status = mBluetoothGatt.writeCharacteristic(otaCharacteristic);
}
Step 2: After writing the profile mode we get on Characteristic Write callback registered with the BLE framework. If the profile mode is set successfully, set the connection parameters for the device that is suitable for transferring chunks of firmware for an upgrade. These connection parameters should be only temporary which means these values are applicable only during an upgrade process.
Briefly explaining, connection parameters are nothing but the time at which a sequence of data is exchanged (which is also known as a connection event) between master and slave. Below is the set of key variables that define connection parameters between master and slave:
a . Connection interval: The time between the beginning of two consecutive connection events, we need to pass it as minimum and maximum values. For the OAD upgrade we pass 15 million for both min and max intervals.
b . Slave latency: The number of connection events that can be skipped to decide the disconnection between master and slave. During OAD this value should be 0 since we can’t afford to miss any packets to make the successful firmware upgrade.
c . Connection supervision timeout: The maximum time between 2 received data packets before a connection is considered lost. In our case, the value of this variable is 500 miles.
Below is the code to set connection parameters for the device :
BluetoothGattService connService = mBluetoothGatt.getService(CONN_SERVICE_UUID);
if (connService != null) {
BluetoothGattCharacteristic connCharacteristic = connService.getCharacteristic(CONN_CHARACTERISTIC_UUID);
if (connCharacteristic != null) {
// Make sure connection interval is long enough for OAD (Android default connection interval is 7.5 ms)
byte[] value = { Conversion.loUint16(OAD_CONN_INTERVAL), // gets LSB of 2 byte value
Conversion.hiUint16(OAD_CONN_INTERVAL), // gets MSB of 2 byte value
Conversion.loUint16(OAD_CONN_INTERVAL),
Conversion.hiUint16(OAD_CONN_INTERVAL), 0, 0,
Conversion.loUint16(OAD_SUPERVISION_TIMEOUT),
Conversion.hiUint16(OAD_SUPERVISION_TIMEOUT)
};
connCharacteristic.setValue(value);
status = mBluetoothGatt.writeCharacteristic(connCharacteristic);
}
Step 3: Once the connection parameter is set we should disconnect and connect the device to make sure new values are used by the master. Again the disconnection should be done in on Characteristic Write callback after making sure that the connection parameter is set successfully.
Step 4: After the above step wait for the connection to be established between the devices to proceed further. Once a connection is set between the devices we should get the current firmware image info on the master device. This can be achieved by enabling the notification on a device to read the firmware information (we can also get the firmware info by reading the characteristic from BluetoothGatt, but this solely depends on how the master device is programmed).
BluetoothGattService fwService = mBluetoothGatt.getService(FW_SERVICE_UUID);
if(fwService != null) {
BluetoothGattCharacteristic fwCharacteristic = fwService.getCharacteristic(FW_CHARACTERISTIC_UUID);
// Enable notification
status = mBluetoothGatt.setCharacteristicNotification(fwCharacteristic, true);
// Prepare data for request (try image A and B respectively, only one of
// them will give a notification with the image info)
if (status) {
status = mBluetoothGatt.writeCharacteristic(fwCharacteristic, (byte) 0);
}
// Give some delay before enabling notification for B type firmware
if (status) {
status = mBluetoothGatt.writeCharacteristic(fwCharacteristic, (byte) 1);
}
}
Step 5: After enabling notification in step 4, we get the onCharacteristicChanged callback which carries current firmware info. Basically, there are two types of firmware versions ‘A’ and ‘B’, if the current firmware version is ‘A’ we should flash ‘B’ else if the current firmware version is ‘B’ we should flash the ‘A’ version firmware. After deciding on the new firmware (to be flashed) we should write its version, length, and uid in the same order onto the device.
// Prepare image notification
byte[] buf = new byte[2 + 2 + 8]; // 2 bytes for version, 2 bytes for length and 8 bytes for UID
buf[0] = Conversion.loUint16(mFileImgHdr.ver); // version of new firmware
buf[1] = Conversion.hiUint16(mFileImgHdr.ver);
buf[2] = Conversion.loUint16(mFileImgHdr.len); // length of new firmware
buf[3] = Conversion.hiUint16(mFileImgHdr.len);
System.arraycopy(mFileImgHdr.uid, 0, buf, 4, 4); // UID of new firmware
BluetoothGattService fwService = mBluetoothGatt.getService(FW_SERVICE_UUID);
if(fwService != null) {
BluetoothGattCharacteristic fwCharacteristic = fwService.getCharacteristic(FW_CHARACTERISTIC_UUID);
if(fwCharacteristic != null) {
// Send image notification
fwCharacteristic.setValue(buf);
status = mBluetoothGatt.writeCharacteristic(fwCharacteristic);
}
}
Step 6: Wait for the onCharacteristicWrite callback and check the write status, if new firmware info is successfully written start writing new firmware in blocks of 18 bytes (the first 2 bytes contain block number and the next 16 bytes contain actual firmware data). This step is the final stage where we flash firmware binary files of around 127 KB(126976 bytes) by dividing them into 16 bytes blocks, so totally we need to write 7936 blocks. Each block of data should be prefixed with extra 2 bytes which contain the block number.
After writing each block we need to give a time delay of around 30 million which sums up to approximately 4 mins to finish the firmware upgrade. This cannot be done on the main thread else we will end up with an ANR scenario. So we need to spawn a new thread that can be executed every 30 miles. We can do this by creating HandlerThread or TimerTask. If we are using HandlerThread we need to send a delayed message using Handler(attached to the HandlerThread instance created) every 30 millis, this triggers the handleMessage() function of the Handler on the background thread inside which we write each block. We can also use TimerTask API which can be assigned to a Timer. Calling Timer.scheduleAtFixedRate() (which takes time delay as one of its parameters) triggers the run() method on the background thread of the TimerTask class every 30 millis.
// This function should be called every 30-40 millis
private void programBlock() {
// Prepare buffer of size 18 bytes, having first 2 bytes as block number and next 16 bytes firmware data
mOadBuffer[0] = Conversion.loUint16(BLOCK_NUMBER);
mOadBuffer[1] = Conversion.hiUint16(BLOCK_NUMBER);
// copy 16 bytes from file to buffer
System.arraycopy(mFileBuffer, mFileBlockIndex, mOadBuffer, 2, BLOCK_SIZE);
BluetoothGattService oadService = mBluetoothGatt.getService(OAD_SERVICE_UUID);
if(oadService != null) {
BluetoothGattCharacteristic oadCharacteristic = oadService.getCharacteristic(OAD_CHARACTERISTIC);
if(oadCharacteristic != null) {
oadCharacteristic.setValue(mOadBuffer);
success = mBluetoothGatt.writeCharacteristic(oadCharacteristic);
}
}
}
After writing all the blocks the master device automatically disconnects itself so that when it is again reconnected it runs on the new firmware and switches to the normal connection parameters.
At Cumulations, we have expertise in building Bluetooth low-energy apps. If you have any requirements to build mobile apps for wearable devices and internet of things mobile apps, please contact us: https://www.cumulations.com/contact-us


 +91-984-5825982 | +91-996-4689921
 sales@cumulations.com
 Send your requirement


