
 +91-984-5825982 | +91-996-4689921
 sales@cumulations.com
 Send your requirement
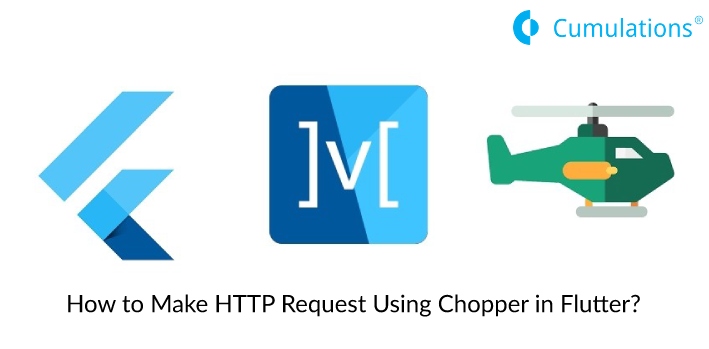
We are going to develop an app to fetch and display data from the Omdb API using Chopper and MobX.
Our objective is to make requests to the API using Chopper and manage the states using MobX.
Let’s start it one by one with the basic understanding of flutter, MobX, and Chopper.
What is flutter?
Flutter app development is an SDK created by Google to develop native apps for Android and iOS.
Flutter can build apps in very less time with stunning UI.
What is MobX?
MobX is a state management library, originally developed for JavaScript but now is there for Dart also.
It makes the connection of the reactive data of our application with the UI very simple.
As developers, we just have to see where the data is to be consumed in the UI without worrying about to keep them in sync.
What is Chopper?
Chopper is a library to make HTTP requests inspired by Retrofit and is built on top of dart Http which, besides other things, generates code to simplify the development process for us.
Why use MobX and Chopper?
We want to use MobX and Chopper because both work with the help of codegen and generate codes automatically, thus reducing our work significantly.

First Part: Create Chopper client
First thing first, visit the OmdbApi and get your api key by registering your email address.
Now the fun part begins, our journey starts from the pubspec.yaml.
We have to add few dependencies in the pubspec.yaml

Add the following as dependencies:
chopper
mobx
flutter_mobx
provider
The following go as dev_dependencies as we do not want these to be shipped with our end product.
chopper_generator
mobx_codegen
build_runner
Our next step would be to make the request to the Api.
Create a folder as data under the lib folder of your project. And create a file serializer.dart

At this point of time you would be getting some errors but don’t worry they would be gone soon.
“fetchApiData.chopper.dart” is a part file that would be generated automatically by the chopper_generator.
@ChopperApi(baseUrl:’your_url’) would be the end point of your API.
@Get(path:’title’) would tell the generator that this is a get request and we want to pass title as a parameter in the function fetchData.
The last piece of code is to access the create method without instantiating the fetchApiData class.
You might be wondering what is this _$FetchApiData, it is nothing but the generated class. You can see that file once the code generates itself.
The Second Part: Create MobX model
The second part consists of managing the states using MobX. That is to display the fetched data using MobX and creating a serializer to save our data as we want.
For that, you have to create another folder named as serializer under the lib folder.
Create a file named getApiData.dart

Now, the serializer is created the MobX magic begins.
Create another folder named model under the lib.
Name the file as mobx.dart under the model folder and now we want to fetch the data on button press and display it on our screens.

The second line of the snippet makes the abstract class as a concrete class.
@observable tells the MobX generator what is to be observed and manage the states when it is changed.
@action tells when to observe the observable.
Under this, we created a function to be called when we press our button and map the data received from the API as per our serializer using the method fromJson which we created in our serializer.
Lastly, run the given command and voila all your errors gone.
flutter packages pub run build_runner watchSo now our backend part is completed.
Our next step would be to build the UI.
Third Part: Building the UI
In main.dart we just call our create method to instantiate our chopper client.

Create a folder named screens under the lib folder, I promise this would the last folder.
Create the post.dart to as our home screen where the data is displayed.

This is our FAB on pressed, data is fetched on click of the FAB.

This is to display the data.
Rest I think you can get. UI is up to you guys, how you want it.
I have used async loader it is totally up to you whether you want to use it or not.
One last thing you have to keep in mind is changing the following code in the fetchApi.chopper.dart

This is generated by the code gen
You have to change this to

FAQs
Mastering Flutter App Development with MobX and Chopper
Understanding the Core Technologies
flutter mobx tutorial, mobx flutter tutorial, flutter chopper, flutter mobx example, chopper_generator, mobx flutter example, mobx dart
Flutter is a powerful UI toolkit from Google for building natively compiled applications for mobile, web, and desktop from a single codebase. MobX is a state management library that simplifies the connection between reactive data and the UI, making it an excellent choice for Flutter app development. Chopper is a library inspired by Retrofit that simplifies HTTP requests in Dart, complementing MobX for efficient data fetching.
Building a Flutter App with MobX and Chopper
Project Setup:
- Create a new Flutter project.
- Add necessary dependencies to
pubspec.yaml:YAMLdependencies: flutter: sdk: flutter mobx: ^2.3.3+2 flutter_mobx: ^2.2.1+1 chopper: ^3.2.3 provider: ^6.0.2 dev_dependencies: chopper_generator: ^3.2.3 mobx_codegen: ^2.6.1 build_runner: ^2.4.11
Create Chopper Client:
- Generate a Chopper service using
chopper_generator:Dartimport 'package:chopper/chopper.dart'; part 'fetch_api_data.chopper.dart'; // part of generated code @ChopperApi(baseUrl: 'https://www.omdbapi.com/') abstract class FetchApiData { @Get(path: 'title') Future<Response> fetchData(@Query('t') String title); } - Create a
ChopperClientinstance:Dartfinal client = ChopperClient( baseUrl: 'https://www.omdbapi.com/', services: [ _$FetchApiData(), ], converter: JsonConverter(), );
- Generate a Chopper service using
Create MobX Store:
- Define a MobX store to manage app state:Dart
import 'package:mobx/mobx.dart';

part 'mobx.g.dart';

class MovieStore = _MovieStore with _$MovieStore;

abstract class _MovieStore with Store {
  @observable
  ObservableList<Movie> movies = ObservableList();

  @action
  Future<void> fetchMovies(String title) async {
    // Use Chopper client to fetch data
    // Update movies observable
  }
}
- Define a MobX store to manage app state:
Build the UI:
- Use
Observerwidget to react to state changes:Dartimport 'package:flutter/material.dart'; import 'package:flutter_mobx/flutter_mobx.dart'; class MovieList extends StatelessWidget { final MovieStore movieStore; // ... @override Widget build(BuildContext context) { return Scaffold( body: Observer( builder: (_) => ListView.builder( itemCount: movieStore.movies.length, itemBuilder: (context, index) { // Display movie data }, ), ), floatingActionButton: FloatingActionButton( onPressed: () { movieStore.fetchMovies('your_movie_title'); }, child: Icon(Icons.search), ), ); } }
- Use
Best Practices for Flutter API Calls
flutter api call best practices
- Error Handling: Implement proper error handling for network and API errors.
- Loading Indicators: Display loading indicators during API calls.
- Caching: Cache API responses to improve performance.
- Dependency Injection: Use dependency injection to manage dependencies.
- Data Validation: Validate API responses before using them.
- Code Organization: Keep your code clean and organized.